What Is a Roofing Contractor?

Roofing Contractors are professionals who specialize in the roof of your home. They often carry out work for insurance claims. They typically gain standing with manufacturers that allow them to offer substantial warranties.
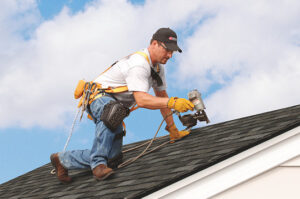
Roofing

Getting estimates from multiple contractors is best. Make sure the estimates are based on the same scope of work and provide similar materials and systems.

Roofing contractors have the expertise to manage different aspects of the re-roofing process. They can handle difficult or complex projects, address unexpected problems, and ensure that the project is completed on time and within budget. A good contractor will be able to communicate with you throughout the project and provide a quick response when concerns arise. They should also be able to explain how they will handle any additional work that may arise during the project.

A reputable roofing contractor will be transparent about their post-project support policies and insurance claims. They will have a clear process in place for handling any issues that may arise after the job is complete. This will give you peace of mind that your contractor will stand behind their work and will be able to resolve any issues quickly and effectively.

When selecting a roofing contractor, you should ask about their experience and check references. You should also ask about their pricing and what services they include in their quotes. A good roofing contractor will be able to provide you with a detailed contract that outlines what is included in the quote and what work is expected to be performed.

Another important question to ask is whether or not the company uses subcontractors. Many companies that specialize in shingle, tile and metal roofs will have their own full-time workers rather than subcontracting the work to other professionals. This can make a difference in the quality of work and how quickly it is done.

Lastly, a reputable roofing contractor will have a wide range of skills and can perform other home improvement work as well, such as siding and window installation. This can save you time and money because you only have to deal with one contractor instead of several different people.

Regardless of the size of your project, it is important to understand what a roofing contractor can do for you before hiring them. You should also know the types of repairs that you need and request price estimates from multiple roofing companies.

Experience

Roofing contractors typically have extensive experience in the field, and they can offer a wide variety of services. They know how to manage the various aspects of a re-roofing project, from initial assessment and estimate through the permitting process, inspections, and final cleanup. They can also use their past experience to anticipate problems that may occur and develop strategies for addressing them.

If you are considering hiring a roofing contractor, be sure to request references from previous clients. These can give you a good idea of the contractor’s quality of work and their level of professionalism. It is also a good idea to check online reviews and social media profiles, which can help you weed out untrustworthy contractors. Lastly, you should look for a contractor that has gained standing with manufacturers as this can allow them to offer extended warranties on their services.

When looking for a roofing contractor, it is also important to consider how they handle complaints and bad reviews. For example, if a customer complained about a leaky roof shortly after the project was completed, how did the contractor respond? Did they take responsibility for the problem and make it right?

Depending on where you live, there may be licensing requirements for roofing contractors. In addition, you must complete pre-licensing training and pass the exam. You may also need to obtain a business license, which can vary by state. To find out what requirements apply in your area, contact the local licensing department. You can also find out about other industry-specific resources, such as ladder safety guides and a list of roofing materials.

License

A roofing contractor can provide a wide range of services, including the installation, repair and maintenance of roofs and other related structures. Depending on where they work, a roofing contractor may be required to hold a state license. This is particularly true if they do commercial or residential work. In order to obtain a roofer’s license, they may be required to complete pre-license training and pass an exam. They may also be required to carry insurance coverage to protect against any liabilities incurred on the job.

A roofing contractor must obtain a Construction Contractor License or Residential Specialty Contractor License from the state’s Construction Contractors Board. To obtain this, they must first complete pre-licensing training and pass the PSI examination for either the construction contractors or residential specialty. They must then register with the board and submit documentation and fees. Moreover, they must also have workers’ compensation and general liability insurance.

Roofing contractors in Alaska must be licensed to perform roofing and siding work. To qualify, they must have three years of experience and pass an exam administered by the state’s Contractors Registration and Licensing Board. Additionally, they must be able to provide proof of liability and worker’s compensation insurance.

Although it does not require a roofing contractor to have a state license, it is recommended that they be licensed. This is because the new law requires certain disclosures on home improvement contracts, and a roofing contractor must be licensed in order to meet these requirements.

Besides being licensed, a roofing contractor must have a good reputation for quality work and customer service. It is also a good idea for them to be affiliated with a national or regional roofing association. This will ensure that they are up to date on any developments in the industry and have access to information about roofing materials and techniques. In addition, roofing associations often offer courses and seminars to help roofing contractors improve their skills. They can also help them keep abreast of any regulatory changes in the industry. They can also assist with the filing of state or local permits and inspections.

Insurance

When choosing a roofing contractor, it is critical to check their insurance coverage. They should have a Commercial General Liability Insurance Policy covering their business operations, including property damage and bodily injury to third parties. The policy should also cover legal fees and judgments awarded against them. In addition, a roofer should have an Equipment Floater policy that covers a broader range of hazards that can damage their equipment. It should cover things such as fire, vandalism, theft and natural disasters.

A roofer should also have workers’ compensation insurance for their employees. This type of policy pays medical expenses and lost wages if an employee is injured on the job. This is especially important because roofing is a dangerous job. If a worker is not covered by workers’ compensation, the owner of the roofing company could be responsible for hospital bills, funeral costs and lost income.

Another thing to look for is a roofer’s certificate of insurance. This document should show the companies that provide the insurance, the policy number and the dates of coverage. If you notice that the coverage expires or changes, this is a red flag. Changing insurers can cause gaps in coverage, leaving you exposed to liability.

You should also ask a potential roofer to show you proof of insurance before they start work. This is a standard practice in the industry. Often, contractors will show you an accord form that shows the names of their insurance carriers, policy numbers and dates of coverage. This is the best way to verify that they have insurance. However, you should keep in mind that these documents can be faked or the coverage may be lapsed or improperly endorsed.

Lastly, roofers should have builders risk insurance for their projects. This type of small business insurance protects against damage to buildings while they are under construction. It includes coverage for materials, labor and building supplies. It should also include coverage for construction vehicles, such as trucks and plows.
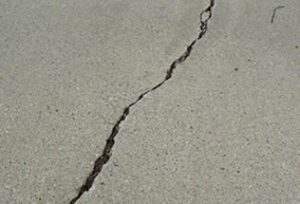
Concrete Repair – A Complicated Job That Requires Thorough Assessment and Selection of Materials

Whether the damage is cosmetic or structural, concrete repair products offer contractors more options than ever. New materials can create a strong bond, provide strength, and even disguise patching and cracks.

Concrete Repair

The key to any concrete repair is identifying the cause of the damage. This involves a thorough evaluation of the structure, destructive and nondestructive testing, and chemical and petrographic analysis of concrete samples. For professional help, contact Level Ground Excavation.

Concrete repair can be a complex project. Whether it’s reforming an edge for a residential concrete step, injecting repair material into a crack in a slab or replacing an entire section of sinking, sunken concrete, the job requires a thorough evaluation of the existing condition, determination of the causes of the deficiency and selection of appropriate repairs methods and materials. This assessment includes review of available design and construction documents, a structural analysis of the structure in its current deficient condition, destructive and nondestructive testing, visual inspections, abrasion tests, and chemical and petrographic testing of concrete samples.

It is important that the contractor clearly understand what the concrete problem is and determine the cause, whether it is a lack of adequate drainage, improper construction or ground movement. Incorrect identification will lead to a substandard result or a repair that fails prematurely.

For a partial-depth repair, chipping deteriorated concrete to expose sound and clean concrete is the first step. This is done with a lightweight 15 lb electric or pneumatic chipping hammer to avoid damaging the sound concrete that will remain in place.

A scratch test is also a vital part of the assessment process. A sharp, rough surface with an angular edge is ideal for the repair material to bond with. Surface preparation should be free of any oil, grease or paint that can prevent the new repair material from adhering to the concrete.

The most common sign that concrete needs repairing is when areas begin to look uneven. This is usually due to weather conditions or bad foundation work, and it’s essential that any concrete issues are addressed early on to prevent further damage.

When it comes to larger, more serious problems, concrete experts are required. A professional will be able to advise and recommend the right solution for the problem, from filling a small crack in a driveway to raising sunken sections of concrete with a product like PolyLevel. It is a noninvasive, quick and economical way to fill voids in concrete and lift it back to its original position, because it solves the root issue by injecting a polyurethane foam that compacts the soil.

Preparation

The primary concern in concrete repair is that the material and structure being repaired bond correctly to the existing substrate. This requires adequate surface preparation of the concrete before any material is applied. The surface must be free from dirt, oil, grease and other contaminants that may interfere with a strong bond. It is also important to determine any underlying problems that need to be corrected in order for the repairs to last.

Depending on the type of repair material, the concrete should be prepared to achieve a suitable surface profile. This can be done by chemical cleaning, acid etching, mechanical preparation and other methods. The profile is important as the thickness of a repair can affect certain properties such as dry shrinkage, elastic modulus and thermal coefficients. Some materials cannot be used on deep repairs as they can develop internal stresses that can cause sag and spalling.

If a liquid bonding agent is to be used, the existing concrete should be dampened and allowed to dry to a tacky condition. The bonding agent can be painted on or sprayed on if desired, but direct application is better. It is important to follow the instructions for the bonding agent, as they can vary slightly from product to product.

It is a good idea to hire a professional contractor for concrete repairs. They will have the expertise and experience to ensure that the repairs are completed properly and will last. They will also be able to advise on preventative maintenance to avoid future damage.

Some concrete contractors have access to high-quality repair materials that are not available to the general public. These materials often include polymers that provide a stronger bond with concrete and add durability to the repairs. They can also reduce the time and cost of the repair process.

It is also important to make sure that the underlying problem is addressed when making concrete repairs. For example, if the concrete is cracked because it has settled over time, then it is best to use a lifting solution like polyurethane foam injections to solve the problem and prevent it from happening again.

Filling the Crack

When it comes to concrete repair, the goal is to restore structural integrity. Using a band-aid fix such as mixing a polymer-modified cement product with water and wiping it over cracks is not an effective or long-term solution. This type of quick fix will not stop active cracks from forming, it simply masks them until new tension causes them to expand further.

A much better approach is to remove all existing material from the cracked area and then use a high-strength, rapid set concrete patching material. The patching material should be mixed and troweled into the crack and then sanded down to a smooth surface. The sanding will also help to seal the crack and prevent water and other contaminants from seeping into the concrete once it’s dry.

The next step is to clean the area around the crack. This can be done by using a pressure washer or a brush with a damp rag. This step is necessary because the surface must be free of loose dirt and other debris that could keep the patching material from adhering to the concrete. It is also important to make sure the crack is completely dry, so it can be resealed with a concrete bonding sealant.

Before filling the crack, it is a good idea to prime the concrete with a masonry cleaner. This will ensure that the repair is well-bonded to the existing concrete and will not flake off in the future. The masonry cleaner can be purchased at most home improvement stores and should be used in accordance with the manufacturer’s instructions.

Lastly, the crack should be cleaned with a power hose or brush to remove any remaining dirt, dust, or other contaminants that would prevent the patching material from adhering to concrete once it’s dried. This step is particularly important if the crack is in an exposed location.

When it comes to repairing slabs of concrete, many contractors prefer a technique called “crack stitching.” This involves drilling additional holes into the slab along the length of the crack and then using metal anchors (U-shaped bars) to bridge the crack from one end to the other. This method is more time consuming than other methods, but it is the best way to stabilize major cracks and prevent them from spreading further.

Sealing

Before the concrete repair is applied, it’s important to make sure the crack is sealed. This is because it prevents moisture and other materials from seeping into the crack, causing more damage to the concrete. This also helps keep the crack from becoming a problem again in the future.

There are a number of different methods for sealing cracks in concrete. Some of these include:

Epoxy injection

This method involves injecting epoxy into the cracks, which then welds them together. This is a good option for structural repairs and can be used on active or dormant cracks. However, it isn’t suitable for cracks that are caused by movement of soil or water.

Concrete routing and sealing

This is a good choice for dormant cracks in concrete and is relatively simple. The crack is cut into a V shape and the area around the crack is cleaned to remove dirt or debris. Then, a plank is placed over the cracked area and the concrete repair material is spread evenly along the plank. This can be done with a trowel or a squeegee, depending on the type of product being used.

Concrete surface patching

This is another great choice for repairing dormant or active concrete cracks in buildings and structures. It is not recommended for structural repairs or for cracks caused by ground swell, water pressure or tree root growth. It is a very quick and easy solution to repair small surface cracks in concrete.

Sealing a concrete crack isn’t as complex as it might seem, and the benefits are many. A professional concrete contractor can help determine the best approach for a repair and guide preventative maintenance to avoid future damage. They can also provide advice on using the proper tools and materials for the job, which will ensure a long-lasting repair.

How to Become a Brick Layer

Bricklayers construct and repair walls, partitions, arches, chimneys and other structures using clay bricks or concrete blocks and mortar. They read blueprints and work in accordance with construction safety regulations.

Brick Layer

They spend time up on scaffolding and work outdoors in all weather conditions. Several routes lead to becoming a bricklayer, including trade school and apprenticeship programs offered by unions. Checkout https://www.bricklayerperthwa.com.au/ for more details.

Bricks are strong, fire-resistant building materials that have been used for thousands of years. They are a good choice for homes because they can be built quickly and offer protection from extreme weather. To become a bricklayer you need the right tools and knowledge. This includes how to mix mortar, lay bricks and keep your work area clean and organized. It also helps to have a passion for working with your hands and an eye for detail.

The first step in laying bricks is to build the foundation. If your structure is going to be more than one story high, it is best to pour a concrete footing. This foundation will be the base of the entire structure and is important for stability and strength. If you are building a simple wall, it is possible to use the ground as a foundation if it is flat and well-draining.

To make sure the bricks you are laying are in line with each other, it is best to set up a mason’s level line. You can do this by putting a pin into the mortar at one end of the wall, and then stretching a string between these points. This string should be taut, but not so tight that it is pulling on the bricks and making them buckle. It is important to keep this line taut as you lay each course of brick, as this will ensure that all of the bricks are the same height.

Once you have your level line and a few rows of brick down, you will want to build a second line along the first. This will help you to keep the bricks in line as you go up your wall. This line can be made with a piece of string and pins, or it can be created by nailing a strip of wood to the brick wall at each point you need to measure.

Once the first row of bricks is in place, you can begin to apply mortar. It is important to spread the mortar evenly so that each brick is secure in place. It is also important to use a trowel to feather through the mortar, so that there are no air bubbles.

Mixing Mortar

Mortar is what binds bricks together, but how it’s mixed makes all the difference. It’s important to get the mix right, too much water and it becomes runny, too little and it weakens the mortar.

When you’re mixing mortar, wear a mask and long-sleeved shirt to protect yourself from airborne dust. Take the time to read the instructions on the bag, especially those regarding slake time and pot life (the period of time between mixing and when the mortar is no longer usable).

Generally, the ratio of cement to sand for laying bricks is 75:2. Cement is a fine powder that’s made by heating limestone and clay in a kiln at extremely high temperatures. It’s what gives the bricks their strength, and it’s also what creates the bond between the sand and other aggregates in the mortar mix. Sand is typically made of finely crushed rock, and it comes in different grades. The best sand for bricklaying is often called builders sand or brick sand. It’s also sometimes referred to as fatty sand because it’s very good at holding the mortar in place.

Once you’ve got the mix right, add a little water at a time and continue to beat the mixture with your trowel in folding and chopping motions. The mixture should become smooth and creamy, like a thick peanut butter or milk shake. It should be able to stand up without falling apart, but it should still be spreadable with a trowel. It shouldn’t be too wet, however, or it will set before you can use it.

If the weather is warm, it’s best to work in small batches, as mortar can “flash set” and become unusable quickly. If the mortar starts to set in your bucket or on your mud board, discard it and mix up a new batch.

When working with a large amount of mortar, it’s important to keep it in the shade to avoid drying out too quickly. If you’re going to be using your mortar for more than an hour, it’s a good idea to mix a fresh batch each hour.

Cutting Bricks

When constructing a brick wall or other project, you may need to cut some of the bricks. This can be a time consuming process, and you may ruin some of the bricks if you are not careful. To avoid this, it is recommended that you use a saw to create the desired cuts.

A masonry saw is ideal for this task because it will provide the cleanest and most accurate cut. However, a miter saw is also suitable and can save you a significant amount of time. In any case, make sure that you have all of the appropriate tools available before starting to cut. This includes a tape measure, a small framing square, and a pencil to mark the specific length you need to cut along the surface of each brick. Try to be as accurate as possible when measuring and marking the bricks to reduce material waste.

Start by placing the brick on a flat surface. Then, use a brick-set chisel to score a line in the shape of your required cut along all four sides of the brick. The chisel should be hammered at a angle so that the force is evenly distributed and does not push the brick away from its original position. The scored line should be about 1/16th inch deep.

Once the brick is scored, it will be easier to break off the unwanted piece with a mason’s hammer. If you have a power drill, you can also use it to create a series of holes along the line. This will make the breaking of the brick much easier and will also help to keep the blades of your tool from wearing down.

After the brick is cut, it is important to smooth out any rough edges and seal up any cracks that may have occurred as a result of making the cut. This is especially important if the brick will be used in a public area, such as a sidewalk or driveway.

As a bricklayer, you should also know how to use caulk and other materials that are typically used in construction projects. This will allow you to create a smooth finish to the completed project and to prevent water and other materials from seeping through the joints of the brick wall.

Finishing Bricks

As the bricklayer completes a row of brick, they need to check it with a tape measure and level. This is important as the bricks need to be evenly spaced and at a certain height. The mortar also needs to be even, and this can only be done by checking the bricks. After the row is finished, the bricklayer needs to remove excess mortar with a trowel and then finish the mortar joints for a clean, professional appearance.

When a brick wall is being built, there are several different patterns that can be used. Some of these include soldier courses, which have the bricks set vertically and with the ends facing out, or running bond, which has the bricks set horizontally with the ends facing in. Depending on the purpose of the wall, there will be other variations that can be used to add extra strength or aesthetics.

Once the foundation is laid, the bricklayer can start building the masonry walls. It is important to lay a solid, thick foundation to ensure that the brickwork is stable and strong. This can be achieved by digging a trench that is at least a foot deep and wide, then mixing the correct ratio of sand to cement for the mortar that will be used to construct the wall. This mixture should be a consistency that can be easily manipulated with the hands.

The next step is to set up indicator posts or measuring rods at both ends of the masonry wall to help maintain consistent levels throughout. These should be 65mm (if using standard sized bricks) above the ground at both ends of the wall. A string line should then be set up between these, and this will act as a guide for the bricklayer. The bricklayer should always use the string line and level to check that the brickwork is correctly positioned as they build the walls.

For a cleaner, more professional look, the bricklayer can use a tool called a butcher, which is a small, round tool that allows them to create a curved edge on the joints of the bricks. This gives a much more finished appearance to the brickwork and helps prevent water from collecting in the joints and potentially damaging the structure of the wall.

Types of Pool Fences

Pool Fences Tampa are an essential layers of protection to help prevent unmonitored children or unaware adults from drowning. It’s also a good way to keep your backyard and pool private.

Pool Fences

With the amount of work that goes into pool ownership, including balancing pH levels and cleaning up broken pool noodles, you don’t want to add another project to your to-do list. That’s why a removable fence is such a great option.

Wooden fences can offer privacy, safety and security to your pool area. They can also be aesthetically pleasing and blend in well with the surrounding landscape. They can either be painted to match your home or a natural color that catches the eye. They are typically less expensive than other types of fencing materials and can be easily repaired if necessary. However, they do have their downfalls including a lack of visibility around the area, making it difficult to keep an eye on children swimming.

One way to overcome this issue is to use a wooden fence that has horizontal slats instead of vertical ones. The space between the slats allows for more air flow without sacrificing privacy. Another option is to have your wooden fence topped with a lattice structure. The diagonal slats allow for a bit more visibility and add to the overall look of your pool fence.

Removable mesh fences are an additional safety measure that can help you meet your local and state’s pool fencing requirements. They are a great choice for homeowners who want to improve the aesthetic of their backyard and pool area without spending too much money on a fence. While they may provide added safety, they cannot be used as the primary pool fence for most residential homes.

When choosing a removable mesh fence, it’s important to keep in mind that you will need to periodically inspect it for any holes or wear and tear. This will ensure that it continues to offer the protection you need.

It’s also a good idea to check with your local city and state offices to find out what the minimum required height for your pool fence is. You should also make sure that your gate and doors are fitted with self-locking, child-proof locks that are out of reach from children. The gates should also open outward away from the pool so that children can’t use objects to climb over the fence.

If you are looking for a beautiful and durable alternative to traditional steel or iron fencing, consider a bamboo fence. While it’s not quite as sturdy as other materials, it is a great choice for homeowners who are looking for a more tropical style in their backyard pool. It’s also a good idea to choose a bamboo fence that is treated against termites and fungus.

Picket Fences

A picket fence provides a simple, classic look to any pool landscape and is one of the more affordable options. It pairs well with any color of pool lining and can complement lounge chairs around the pool. However, it may not be the best option for windy areas as it can cause damage to the fence and could potentially allow for escape from the pool area if someone climbs over the top.

For those who have a modern and contemporary style in mind, glass fencing is the way to go. Made of tempered safety glass, this style is sleek and offers an unobstructed view of the pool. Plus, it’s pet-proof and child-proof.

If you want a more traditional look, you can use an iron fence to create a classic white picket style. Wrought iron is a durable material that can stand up to years of weathering. However, you’ll need to stay on top of maintenance to ensure it does not rust or develop cracks.

Another metal option is tubular steel, which can be more affordable than wrought iron. However, it is not as durable and can start to rust quickly.

A concrete half wall is a solid option for those who want to protect their pools from kids and pets but are looking for an attractive alternative to standard chain-link fences. Plus, you can customize the appearance by adding decorative tiles or paint to the concrete.

There are a lot of options when it comes to pool fences, but it’s important to make sure you choose one that complies with local fencing requirements and keeps your guests and family members safe. Check with your municipality to find out the requirements.

Remember to keep in mind that your pool fence must be a minimum of 4 feet high, with gates that open outward and are self-closing and self-latching. Also, your fence must not be climbable and have less than 4 inches between the rails and a latch at least 54″ above the bottom rail. You can meet these requirements by choosing a 3 rail fence with a drop rail or a flat top rail or a vertical picket.

Concrete Half Walls

If you are looking for an alternative to the traditional wooden fence around your pool, consider concrete half walls. These structures are not only effective in keeping kids and pets out of the pool, but they can also be very decorative. They are also easy to install and require very little maintenance. However, before you decide to build a concrete fence around your pool, it is important to understand the safety issues associated with this type of structure.

Depending on your location, your local government may require you to have a safety fence around your pool. While these fences are not as pretty as other types of pool fencing, they are effective at preventing accidents and deaths. In addition, these fences can be customized to suit your tastes and the needs of your family. You can choose from different colors, heights, and gates. Some options include self-closing gates, which can be locked to prevent children from accidentally opening them.

Some municipalities require you to have a pool fence in order to be eligible for homeowner’s insurance. In these cases, you may need to hire a professional to get the job done. However, if you have some basic tools and building skills, you can do the work yourself. This is not the most difficult construction job, but it’s certainly not for beginners.

Another great option is a mesh fence. These fences are made of a tough, durable material that is almost impossible to penetrate or break. These fences are often used for pools in parks and other public areas, as they provide an extra layer of protection for children and adults. You can find these fences at most hardware stores and home improvement centers.

You can also make your own pool fence by using steel wire and chain link. These fences are strong and durable, and they can be adjusted to fit the shape of your pool. They are also lightweight, which makes them easier to install and remove.

If you’re not sure how to install a pool fence, you can check out this video guide from YouTube. The video guide is not too long, and it explains the entire process step by step. It’s also worth mentioning that you should always use caution when working with any kind of construction project, and it’s best to consult a professional if you’re not a competent builder.

Lattice Fences

Lattice fences can be an ideal option if you’re looking for a way to add some privacy while keeping your pool area visually accessible. They’re also perfect for those who want to create a more unique, design-forward fence that can really make your backyard feel like an oasis. Lattice fences rely on their crisscross pattern to obstruct views into the pool area, which can give you a sense of secluded privacy without blocking all of your beautiful view.

Compared to other solid fence options, lattice fences are relatively budget-friendly, especially when they’re constructed with pre-made panels. They’re also easy to install and can be a great DIY project for those who don’t have a lot of building experience. Lattice fences are durable and long-lasting, making them a great choice for those who want a simple pool fence that will last for years to come.

Wood lattice fences offer a natural, classic look that can complement any landscape design, and they’re a good option if you want to maintain the visibility of your pool while providing some extra privacy. Depending on the type of wood you use, it’s possible to stain your wooden fence for added beauty and protection from sun exposure. However, be sure to keep in mind that wooden fences will require more upkeep than other types of fences, including regular cleaning and staining.

If you’re interested in adding more privacy to your swimming pool area, it’s worth considering adding some plants to the landscaping. Evergreen trees are a popular choice, but you can also consider other tropical options like palms or fruit trees to match your backyard’s aesthetic. Just remember that any trees you plant will increase the amount of maintenance you’ll have to do around your pool, since they’ll need watering and trimming on a regular basis.

Considerations When Working On Roofing For Historical Buildings

The roof is an important aspect of any historic building. A deteriorating one will allow water penetration, which can cause damage to the rest of the building and any historical materials or furnishings housed within it.

Roofing experts should be familiar with historic buildings and the type of roof they had originally. Research should include document research, onsite investigation, and physical inspection. If you are considering hiring a professional service, Roofing Longview TX is the right choice.

roofing

Materials

Roofing on historical buildings is not the same as it is on newer homes and requires an extra level of care. Whether the roof needs repairs or replacement, it is important to know what type of materials will be used on the structure. This will ensure that the roofing crew is aware of any unique issues and damage and can make the appropriate repairs to restore the integrity of the building.

Historically, roofing was made from a variety of materials, including clay tiles, wood shingles, and metal. These materials were carefully crafted to complement the design and aesthetic of the building, so it is essential to maintain this style throughout the roofing process.

Many of these historical roofs have a long life expectancy, but they are susceptible to problems such as water intrusion and rot. It is important to keep in mind that these types of problems can lead to serious structural damage and may be irreversible, especially if left untreated. Depending on the original roofing material, a roofing company may suggest applying a protective coating or sealant to reduce damage and prolong the life of the roof.

If the roofing material is unable to be restored, it may be possible to replace the historic roof with a more modern one. This may lower the value of the home, but it is often worth it if it means preserving the history and character of the building. It is also essential to communicate with the neighbors and local officials before beginning work on a historic home or building. This will allow them to adjust their situations and schedules as needed and will prevent any potential liability issues down the road.

A properly constructed historical roof can withstand extreme weather conditions and insulate a building effectively. This can result in lower energy bills and more savings for the homeowner. If you are interested in restoring or maintaining your historical home, it is best to work with a skilled roofing team that has experience working on these types of projects. Taking the time to find the right materials and repair any problems will help your home or building retain its historic character for years to come.

Design

Historic buildings and structures represent a significant part of a community’s cultural heritage, and it is vital to protect them from damage. Roofs, in particular, have a big impact on a building’s appearance and are responsible for protecting the interior from weather elements. However, the design of a historic home’s roof can be complicated and require special care.

In some cases, it may be difficult to find roofing materials that match the original material used in a historical building’s construction. This can make the restoration process more challenging and expensive, but it is important to use high-quality roofing materials to ensure that the structure’s integrity remains intact.

It is also important to preserve the shape, size, and pitch of a historic building’s roof, as well as its style features. This can be accomplished by ensuring that new roof elements, such as skylights, solar panels, and decks, are placed in areas where they will not interfere with the aesthetics of the structure. It is also important to preserve any architectural details, such as cornices and parapets, that were originally installed on a building’s roof.

One way to protect a historic building’s roof is to perform regular maintenance and inspections. This can help to identify potential problems before they become more serious and can prevent costly repairs or replacements. Inspections should be conducted by a qualified professional who can identify any issues and recommend the best course of action to take.

Many historic buildings were built with traditional wood shingles or shakes, but these can be costly and time-consuming to repair or replace. A metal roof can be an excellent alternative for historic buildings, as it offers a more modern look and is also fire-resistant. It is also lightweight, so it will not put unnecessary stress on the load-bearing walls of the building.

If you are looking to restore a historic building, it is important to work with a roofer who has experience working with these types of projects. It is also critical to choose a contractor that has the skills and expertise to work with unique roofing materials and construction techniques. By working with a reputable roofing company, you can rest assured that your historic building’s roof will be protected for generations to come.

Permits

When working on historic buildings, you may be required to obtain a permit for your work. This will ensure that your project complies with local and state building codes. These standards help to protect life, property, and public welfare. Many types of work require a permit.

For example, if you are planning to re-roof your historic home, you will need a roof permit. This will ensure that the new roof meets the requirements of your city’s code. It will also help to ensure that your roof is structurally sound.

You should also check with the historical preservation office of your area to find out what types of permits you might need for your project. They will be able to help you determine what materials and styles of roof would be appropriate for your house. They can also tell you what kinds of materials were used on houses in your area in the past.

In some cases, you will need to obtain a permit before working on a historic building. This is especially true if you live in a designated historic district. The main purpose of a historic district is to stop the piecemeal destruction of an outstanding area. This is accomplished by requiring that all exterior changes be approved before you can start construction.

The permit will usually approve minor modifications to a building’s façade, but you will have to submit a full plan for review and approval. This includes a statement of significance that clearly describes your project. This should be accompanied by a schedule that shows when each step of the process will be completed. In most cases, you will need to have a professional architect submit the plans.

If your project is going to involve a major modification to the structure of your home, you will need to submit a complete set of architectural and engineering plans. You will also need to have a licensed surveyor prepare a topographical map of your property and submit it with the permit application.

Experience

The roof of a historic home plays a critical role. It protects the building’s structural integrity, as well as all the items stored inside from water intrusion and damage. Roofing work on a historic preservation project must be done by someone with experience. This is because a poorly executed roofing project could devalue the property. A skilled and knowledgeable roofer can help ensure that a new roof will be built using the best materials and construction techniques.

Historically, many homes used natural roofing materials. These can include wood shingles, clay tile, or natural slate. Although these materials are durable, they can deteriorate over time. They also require careful maintenance and regular repairs. This type of roofing is also often more expensive than modern synthetic composite roofs. However, it is important to remember that a historical roof can last for decades, so a quality roofing material will pay for itself over the years.

Historic roofing systems are also usually more energy-efficient than modern roofs. The insulation in these structures helps to maintain a cooler temperature during the summer and warmer during the winter, saving homeowners money on their energy bills. However, it is important to understand that a historical roof should not be replaced with a modern roofing system. This can destroy the integrity of the structure, and can even lead to an insurance claim.

A qualified roofer will know how to restore a historic roof without ruining the architecture of the building. They will understand that the different materials used in old buildings require specialized installation methods. They will also have an understanding of the unforeseen challenges that may arise during the restoration process.

Choosing the right roofer for a historic restoration project can be difficult because not all roofing contractors have experience working on historic buildings. A good roofer will have a deep appreciation of the history and culture behind the historic building they are working on. They will also be able to understand the underlying issues that can cause problems with the roof, and they will be able to make adjustments accordingly.

Remodeling Your Bathroom for Accessibility

A lot of people choose to remodel their bathrooms with accessibility in mind. They want to be prepared for an injury or a health crisis that may come their way, or they have elderly family members living with them who need an accessible bathroom. Click https://www.bathremodeljacksonvillefl.com/ to learn more.

bathroom remodeling

A few simple modifications can make the space safer and easier to use for anyone. These changes include:

A well-lit bathroom is important for people with limited mobility. Keeping fixtures like lights, mirrors, and sinks well-lit will help individuals with vision impairments to see what they’re doing. This can reduce the risk of falls, making a handicapped bathroom safer.

It’s also recommended to have ample light sources that can be easily accessed from a sitting position. Swapping out burnt-out light bulbs and adding new fixtures can brighten up the space and make it easier to see when performing tasks.

Another consideration for lighting in a handicapped bathroom is a system that provides options to control brightness. Using multiple switches to control different bathroom areas allows users to customize their experience and maintain independence. This is one of the ways the ADA guidelines for bathrooms promote the concept of universal design principles.

For instance, an ADA-approved wall sconce with a slim profile is ideal for narrow home spaces. Its slender wall extension limits the amount it protrudes from walls, allowing more room for wheelchairs and walkers. This can prevent bumping into or tangling with the fixture, which could injure a person with limited mobility.

Grab bars can reduce the risk of falls by providing a strong, stable grip that helps individuals maintain their standing balance. They can also help individuals transfer to and from the toilet more easily, reducing strain on knees and backs. Additionally, they can add confidence and security to any bathroom design. For these reasons, ADA guidelines for grab bar placement play an important role in creating spaces that are safe and accessible for all users.

Straight grab bars are common and can be mounted horizontally or vertically on any wall surface. However, they are not the only type of grab bar available. There are also grab bars that are designed for specific situations, such as angled grab bars that work in showers or bathtub areas. There are also grab bars with a non-skid coating that can improve safety and comfort for anyone who uses them.

When mounting grab bars, the best method is to screw them into the wall framing for the most secure installation. However, many contractors fail to properly install the required blocking between studs, which can lead to improper grab bar placement that may not meet ADA guidelines and put both the contractor and property owner at risk of liability. When you partner with Improveit to remodel your bathroom, we take the walls down to the studs to ensure the proper blocking is added for accurate grab bar placement.

ADA guidelines specify that grab bars should be located near toilets in both the side and rear walls to support individuals while transferring into or out of the bathroom. In addition, they should be installed in showers and tubs to provide additional support during transfers and while standing up. When correctly placed, these supports can help prevent injuries and increase the independence of individuals with disabilities.

During a bathroom remodel for accessibility, it’s important to consider the design of countertops and vanity areas. While a standard countertop may work for someone who can stand, wheelchair users need a lower workspace. Luckily, plenty of options are available for accessible bathrooms that look beautiful and provide the functionality a wheelchair user needs.

Regarding ADA-compliant bathroom counters, it is recommended that the top rim of the sink be no more than 34 inches from the floor. This height allows the sink to be easily accessed by someone in a wheelchair and still be able to use the faucet, wall switch, and wall outlets. Additionally, the countertop should be no more than 21 inches deep. This is 3 inches shallower than a typical countertop and helps avoid accidental spills for some people with limited mobility.

For an ADA-compliant vanity, it is recommended that the mirror be no higher than 40” from the floor. This ensures that seated users can see themselves well and gives enough space for a grab bar to be installed. For a more finished appearance, corbels can be added to the sides of the vanity. These can be found in Home Designer Core Catalogs> Architectural> Millwork> Ogee Corbel and placed in your plan by clicking in the drawing area and using the Open Object edit tool to display the Millwork Specification dialog.

The goal of a handicap-accessible bathroom is to make the room safe and convenient for anyone who needs it, regardless of their ability level or mobility. With a little planning, it’s easy to create an accessible bathroom that everyone who uses it can use comfortably and safely.

Bathroom accidents are among the most common causes of home injuries, especially for people with limited mobility. Safe and convenient bathroom features such as grab bars, non-slip flooring, and walk-in tubs can reduce these risks by making it easier for individuals to navigate their space without assistance.

Handicap-accessible remodeling can also make it easier to stay in your home as you age, eliminating the need to move into a nursing or assisted living facility. Planning your remodel with aging-in-place principles in mind allows you to enjoy your safe and functional bathroom for years.

When designing your handicap bathroom, it is important to provide adequate floor space for wheelchair maneuvering. We can widen your doorways so that a wheelchair can easily pass through, and we can install lever handles instead of traditional doorknobs to ease operation. In addition, we can install cabinets and shelves at a lower height so that they are easier to reach from a seated position. This can eliminate the need to bend down or overreach, which can lead to back strain and injury.

We can also install a low-profile toilet raised off the ground to make getting on and off easier. In addition, we can add safety grab bars to the shower stall and bathtub to provide additional support. We can even install a hand-held showerhead to reduce the need to reach and grasp the faucet, which can become challenging for people with limited mobility. These simple but effective modifications will help you stay safer and more comfortable in your home for longer, and they can also increase the resale value of your property.

Bathroom mishaps are one of the most common reasons for hospital visits, and they are often caused by tripping over objects that are left out or in the way. An accessible bathroom can help prevent injuries by making it easy for people with disabilities to navigate the space. Our team of remodeling professionals will work to make your new bathroom safe and comfortable without sacrificing style.

In a bathroom remodel, we can install showers with seats and grab bars that allow people to move around more easily, as well as lowered sinks and toilets. Wider doorways and slip-resistant flooring can also be included in the renovation to increase safety. These improvements can help people with limited mobility stay in their homes for as long as possible and maintain a sense of independence and comfort.

Accessible remodeling can include various options, including lowering light switches and installing lever handles instead of knobs requiring pinching. We can even add a dimmer switch to adjust the brightness of the lights based on individual needs.

Another important aspect of an accessible bathroom is a raised toilet that is easy to get on and off. This simple modification makes it easier for individuals with limited mobility to use the restroom and can also reduce back pain from squatting.

A handicap-accessible bathroom can improve the comfort of a home and reduce the need for expensive hospital stays and caregiving services. It is important to have a professional handle the remodeling project to ensure that all of the necessary features are in place. When you are ready to make your home more accessible, contact Metropolitan Bath & Tile. We can discuss your goals and budget to find the right solutions.

The First Steps of the Kitchen Counter Installation Process

kitchen counter installation process

The first step of the kitchen counter installation process is preparing the area to receive the new surface. In this article we’ll cover the preparation steps for quartz or granite countertops. We’ll also discuss the installation process itself. Before you begin, make sure you have the correct tools and materials. We’ll show you how to properly position the counter and how to fit miter bolts. Once you’ve completed these steps, you’re ready to install the new surface. Go to https://thompsonandboys.com/ for more details.

Preparation

Before your kitchen counter installation can begin, remove all of the items from the area. Remove appliances that you do not use on a daily basis, as well as tables, rugs, and any other objects that may be in the way. Make sure that your home has enough air flow, and open windows. Make sure that your floors are clear of dust and debris, and ask your contractor about clean-up procedures before the work begins.

If you are installing an epoxy counter, call a plumber to disconnect any existing plumbing. If you do not, you could end up generating fumes during the installation process. During this visit, you can finalize the details with the templater. Once the countertops are installed, the templater will return to measure the walls. You should expect some noise during this time, so you should plan your cooking around the contractor. If you have a portable island or dining table, move it out of the way for the installers.

Before the countertop installers arrive, remove all kitchen appliances, plants, breakables, and decorations from the area. The contractor will need easy access to the kitchen so make sure to remove these items from the room. Also, be sure to remove anything else that may hinder their work. If possible, arrange a temporary workspace in another room. You can then move the countertop installation onto the new counter. It will be much easier for the installers to move the countertop if you are home during the process.

If you choose a quartz countertop, ensure that the area is level, as quartz does not fit perfectly with cabinets. In areas without cabinets, it may be necessary to install support pieces. If you have a faucet, it may be necessary to remove it so that they can access the countertop. This can save you money, but make sure that you turn off the water before the installation begins. If you do not, it might cause damage to the countertop and surrounding cabinets.

Preparation for countertop installation

Before installing your new kitchen countertop, you will need to prepare your home. To start, you should disconnect the plumbing in the area. After this, you will need to clean up any debris. If possible, you should also remove any tables or appliances from the area. If the project requires moving a table or portable island, be sure to do this first. Also, you should move any items outside so that the countertop installation team can access those areas.

The next step is to protect your floors. The flooring should be clean and clear of debris and any rugs. You should also move any objects that may get in the way during the installation. For example, you might want to remove a table in the entryway with a vase that might break. Another consideration is noise. Make sure to plan your new kitchen countertop installation according to the sound you’d like to hear. Make sure that all surfaces around the new kitchen countertop are level.

The next step in preparing your kitchen for a new countertop is to plan the layout and materials. The layout and materials you’ll need will also depend on the material you choose. For example, a marble countertop might generate fumes, so you’ll need to plan the layout and base cabinets first. You’ll also need to make sure that the windows are open and that you have ample space for the countertop.

Finally, you’ll need to remove the old countertop, if applicable. This process will require several hours. Make sure the area is cleared out enough to accommodate the installer. You may also need to remove the old countertop and place it somewhere out of the way for several hours. You’ll also need to remove any other appliances that might be in the way of the installation. Make sure to keep pets out of the area for the duration of the process. Whether you’re remodeling your entire kitchen or just need a new countertop, you’ll need to prepare the room accordingly.

Preparing for granite countertop installation

Granite countertops are heavy and tricky to transport. It is best to have someone help you with the installation. You must also leave the area clear of all furniture and other materials. It takes anywhere from two to six hours to install a granite countertop in a kitchen. You can help the contractor by avoiding bringing your pets or small children to the installation site. You should also remove any cabinets from the area under the countertops and empty their top drawers.

Make sure to get accurate measurements of your cabinetry, especially the base cabinets. Measure along the entire length of the wall. The fabricator should also check for any obstacles in the kitchen. During the installation, you will need to cut the slab to fit the template. Once you have the measurements, you are ready to hire the fabricator. Ensure that your granite countertop fits perfectly into the kitchen. However, you may need to do some modifications to make it look good.

Make sure that you have an exact date for the installation. A granite countertop installation cannot begin without the installation of the sink and appliances. Without these, the contractor may not know where to cut or how much to remove. Therefore, you should do some preparation beforehand. If you have a sink in the kitchen, you may want to consider hiring a contractor to install it. Make sure that the granite countertop is installed by the same contractor so that the installation process won’t be delayed.

Granite countertops are heavy and can be difficult to install. Before hiring a contractor, make sure you clear a path from the front door to the kitchen. Because granite is heavy, the installer will need access to the space. If they cannot get inside, they can’t install the countertop. You can also prepare your cabinetry for granite by using three-quarter-inch plywood. Be sure to align the edges of the plywood with the edge of the cabinet to ensure that they don’t overhang the countertop. If you can, drill holes for the screws to prevent your cabinet from cracking.

Preparing for quartz countertop installation

If you’re ready to install a new quartz countertop in your kitchen, you need to prepare the cabinet first. While most quartz countertops can be custom-made, you may find that a slab is already installed. This means that you’ll have to cut around the existing slab and prepare the area accordingly. Make sure to take the necessary measurements and clear the area to ensure that the quartz countertop can be installed properly. Remember that quartz is heavy, so you should have a professional do the installation. Doing it yourself may save some money, but it’s best to ask someone with experience and expertise.

Once you’ve selected the design and color of your new kitchen countertops, you’ll need to prepare the cabinet space. Make sure that you’ve roughed in all electrical and plumbing systems. Ensure that all walls are dry and painted. Also make sure the flooring is finished. It’s helpful to have all of your appliances installed in the space before you begin work. Having your appliances in place and ready to go can save you time during installation.

While your new countertops will look beautiful and be a great addition to your kitchen, you should remove any countertops that you may already have. This way, you’ll get the look you want while maintaining the same level of functionality. You should also clear the area of appliances and floor-level cabinets to allow for the installation. Also, make sure that you’ve removed all breakable items from around the installation area. Make sure that everything is out of the way so that the countertop installation team can enter the space without causing any disruptions.

Preparing for quartz countertop installation in kitchen involves removing any existing surfaces and leveling cabinet surfaces. To ensure a level surface, you can place wooden shims between the countertops and the cabinets. Then, make sure to paint or seal the cabinets before installing the quartz. Make sure to allow sufficient time for the countertop to “set” before you remove the tape. So, start preparing for the installation!

Preparing for laminate countertop installation

To install a laminate countertop in a kitchen, it is essential to prepare the surface well beforehand. Depending on the type of countertop you are installing, you may have to make some changes. For example, you may need to install a wood riser to separate the countertop from its base. Using the riser, you can separate the laminate from its base, and then apply contact cement to the surfaces. Then, use a J-roller to apply the cement firmly. Be sure to avoid rolling the laminate over the edge as this could snap the laminate.

If you are installing a U or L-shaped countertop, you must cut the precut miters to fit together. Be sure to use a sealant on the precut miters. Apply the sealant to each miter and tighten it securely. This will help the countertop adhere to the wall properly. If you are installing a single sheet, you need to use two pieces of wood to form the L-shape.

Before installing the laminate countertop, you should prepare the area by clearing the area and removing the old countertops. Make sure to wear safety goggles and wear protective gear while adjusting the preformed laminate. Before starting the installation, you can use masking tape to protect the counter from chips and other debris. Measure the length of the countertop using a tape measure. You should also use a square leg and pencil to make a straight cut line.

If you are installing a Formica(r) brand laminate countertop in a kitchen, you need to prepare the wall for the laminate before you do anything else. Then, prepare the surface with contact cement. It will dry and fit snugly. You may have to clean the bearing of the handsaw if it dries. If you do not have a trimmer, you can use a handsaw.

Expert Remodeling Contractors

The right home remodeling contractor can make all the difference in your renovation. Narrow down your candidates by examining portfolios of their previous work, checking licensing and referrals and asking questions.

Word of mouth is an excellent way to find qualified contractors. Ask family, friends and neighbors about their experiences with home renovation contractors.

Know What You Want

A remodel is a major undertaking, and you want to hire the right contractor for it. Just as you wouldn’t choose the first applicant for a job, it is important to narrow down your candidates and carefully select the best one to work with on your home improvement project. Take the time to examine portfolios of previous projects, check licensing and listen to recommendations from family and friends to make an informed decision.

The type of remodeling you plan to do can have a direct impact on which contractor you should hire. For instance, if your home needs extensive structural changes or you are planning to take down a load-bearing wall, it is crucial that the contractor you select has expertise in these types of jobs. You should also be sure to find out how long they have been in business and how many projects of this type they have completed.

Once you have a list of potential contractors, ask them for a portfolio of their recent jobs. This will give you a good idea of their style and whether it matches your own. It will also allow you to see their work in progress and the finished product. You can even ask to see blueprints or sketches of the projects to get a better feel for their process.

While a portfolio is a great way to gauge the quality of work, you should also be sure to read online reviews and testimonials from past clients. You should look for projects that are similar to yours, and make sure to focus on the positive aspects of the remodeling experience as well as any issues.

The most important thing to remember when selecting a contractor is that you will be working with this person for as long as the remodel takes place, so it is essential that your personalities match. If you feel uncomfortable from the start or that your questions are not being answered in a clear and understandable manner, it may be best to move on to another candidate.

Look for Credentials

When it comes to hiring a remodeler, you shouldn’t be afraid to ask questions. A home remodel is a significant investment, and you want to ensure that the contractor is qualified and dedicated to your project. Choosing the right remodeler can make or break your project’s success.

Start your search by asking friends for referrals. They’ll be able to give you a firsthand account of their experiences, as well as the type of work that was done. You can also search online reviews on websites geared toward remodeling contractors. However, remember that online reviews can be biased and are only one-sided.

Once you’ve narrowed down your potential remodelers, check their websites for high-quality photo galleries and references. You can also ask for license and insurance credentials before scheduling an in-home appointment. Lastly, look for active memberships with professional associations in the remodeling industry. These affiliations can help you determine a remodeler’s expertise, processes, team members, suppliers and special skills.

You’ll also want to consider whether a contractor has an in-house designer or architect. Having all of these services under one roof can make the process more efficient and cost-effective. Plus, having a designer or architect involved in the process can prevent delays caused by miscommunications between the builder and client. This can be especially important if you’re planning a larger home remodel, like converting a garage into a living room or taking down a load-bearing wall. A designer or architect can help you create a design that will accommodate these limitations.

Check References

The home remodeling process can be overwhelming for homeowners, and the decisions that must be made are important. It is a good idea to interview more than one contractor before making a final decision. This will give you a chance to examine portfolios of previous work, check licensing and get referrals. Then, you can select the contractor who is best suited to your home remodel.

When examining a remodeler’s portfolio, look for photos of projects from the last year that are similar in style to yours. In addition, it is a good idea to ask for pictures of blueprints or sketches so you can see how the contractor approaches a project. In addition to seeing the finished product, it is a good idea to ask each contractor for references that you can call. When calling the references, ask each how they were treated and if the contractor was professional and open to communicating with them.

It is also a good idea to ask each reference for an estimate of how long the job will take and what it will cost. This will help you decide if the contractor can complete your project within the time frame and budget that you have in mind.

Another thing to look for in a remodeling contractor is an active membership in professional association organizations. Many organizations promote their member contractors and have websites that show photos of their past work. It is a good idea to visit the website of each remodeling contractor before you choose one to find out what types of projects they have done and what their customer satisfaction rating is.

It is also a good idea to visit several of the contractor’s past projects in person. This will allow you to meet the contractor and his or her team members and see their working environment. It will also give you a better idea of how the contractor treats his or her employees and clients. In general, a well-run construction company will be proud to display its recent projects and will be eager to talk about the projects with you.

Ask Questions

Once you have your list of potential contractors, take the time to personally interview each one. This is not just a chance for them to learn more about your project; it’s also your opportunity to ask important questions.

Ask each contractor to provide you with a portfolio of work they have completed. This can be in the form of a physical portfolio or a link to a website with images of projects they have done. Make sure you take the time to look at the before and after photos as well as pictures of blueprints or sketches. This will give you a clearer picture of their level of expertise and quality of work.

You will also want to ask each remodeler about their process and how they work with clients. You will want to be confident that they have a strong grasp of your vision and understand your goals. This will ensure that the finished product will be exactly what you hoped for and minimize any surprises down the line.

Finally, it’s a good idea to ask each remodeling contractor how long they have been in business and how many years of experience they have. This will help you determine if they have the knowledge and skill set to complete your job.

Choosing a remodeling contractor is a serious decision that will impact the quality and overall success of your remodel. It’s important to take the time to find a professional you can trust with your home’s renovation. By following these simple tips, you can be sure to find the perfect contractor for your job!