Bricklayers construct and repair walls, partitions, arches, chimneys and other structures using clay bricks or concrete blocks and mortar. They read blueprints and work in accordance with construction safety regulations.
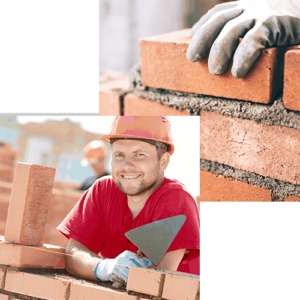
They spend time up on scaffolding and work outdoors in all weather conditions. Several routes lead to becoming a bricklayer, including trade school and apprenticeship programs offered by unions. Checkout https://www.bricklayerperthwa.com.au/ for more details.
Bricks are strong, fire-resistant building materials that have been used for thousands of years. They are a good choice for homes because they can be built quickly and offer protection from extreme weather. To become a bricklayer you need the right tools and knowledge. This includes how to mix mortar, lay bricks and keep your work area clean and organized. It also helps to have a passion for working with your hands and an eye for detail.
The first step in laying bricks is to build the foundation. If your structure is going to be more than one story high, it is best to pour a concrete footing. This foundation will be the base of the entire structure and is important for stability and strength. If you are building a simple wall, it is possible to use the ground as a foundation if it is flat and well-draining.
To make sure the bricks you are laying are in line with each other, it is best to set up a mason’s level line. You can do this by putting a pin into the mortar at one end of the wall, and then stretching a string between these points. This string should be taut, but not so tight that it is pulling on the bricks and making them buckle. It is important to keep this line taut as you lay each course of brick, as this will ensure that all of the bricks are the same height.
Once you have your level line and a few rows of brick down, you will want to build a second line along the first. This will help you to keep the bricks in line as you go up your wall. This line can be made with a piece of string and pins, or it can be created by nailing a strip of wood to the brick wall at each point you need to measure.
Once the first row of bricks is in place, you can begin to apply mortar. It is important to spread the mortar evenly so that each brick is secure in place. It is also important to use a trowel to feather through the mortar, so that there are no air bubbles.
Mixing Mortar
Mortar is what binds bricks together, but how it’s mixed makes all the difference. It’s important to get the mix right, too much water and it becomes runny, too little and it weakens the mortar.
When you’re mixing mortar, wear a mask and long-sleeved shirt to protect yourself from airborne dust. Take the time to read the instructions on the bag, especially those regarding slake time and pot life (the period of time between mixing and when the mortar is no longer usable).
Generally, the ratio of cement to sand for laying bricks is 75:2. Cement is a fine powder that’s made by heating limestone and clay in a kiln at extremely high temperatures. It’s what gives the bricks their strength, and it’s also what creates the bond between the sand and other aggregates in the mortar mix. Sand is typically made of finely crushed rock, and it comes in different grades. The best sand for bricklaying is often called builders sand or brick sand. It’s also sometimes referred to as fatty sand because it’s very good at holding the mortar in place.
Once you’ve got the mix right, add a little water at a time and continue to beat the mixture with your trowel in folding and chopping motions. The mixture should become smooth and creamy, like a thick peanut butter or milk shake. It should be able to stand up without falling apart, but it should still be spreadable with a trowel. It shouldn’t be too wet, however, or it will set before you can use it.
If the weather is warm, it’s best to work in small batches, as mortar can “flash set” and become unusable quickly. If the mortar starts to set in your bucket or on your mud board, discard it and mix up a new batch.
When working with a large amount of mortar, it’s important to keep it in the shade to avoid drying out too quickly. If you’re going to be using your mortar for more than an hour, it’s a good idea to mix a fresh batch each hour.
Cutting Bricks
When constructing a brick wall or other project, you may need to cut some of the bricks. This can be a time consuming process, and you may ruin some of the bricks if you are not careful. To avoid this, it is recommended that you use a saw to create the desired cuts.
A masonry saw is ideal for this task because it will provide the cleanest and most accurate cut. However, a miter saw is also suitable and can save you a significant amount of time. In any case, make sure that you have all of the appropriate tools available before starting to cut. This includes a tape measure, a small framing square, and a pencil to mark the specific length you need to cut along the surface of each brick. Try to be as accurate as possible when measuring and marking the bricks to reduce material waste.
Start by placing the brick on a flat surface. Then, use a brick-set chisel to score a line in the shape of your required cut along all four sides of the brick. The chisel should be hammered at a angle so that the force is evenly distributed and does not push the brick away from its original position. The scored line should be about 1/16th inch deep.
Once the brick is scored, it will be easier to break off the unwanted piece with a mason’s hammer. If you have a power drill, you can also use it to create a series of holes along the line. This will make the breaking of the brick much easier and will also help to keep the blades of your tool from wearing down.
After the brick is cut, it is important to smooth out any rough edges and seal up any cracks that may have occurred as a result of making the cut. This is especially important if the brick will be used in a public area, such as a sidewalk or driveway.
As a bricklayer, you should also know how to use caulk and other materials that are typically used in construction projects. This will allow you to create a smooth finish to the completed project and to prevent water and other materials from seeping through the joints of the brick wall.
Finishing Bricks
As the bricklayer completes a row of brick, they need to check it with a tape measure and level. This is important as the bricks need to be evenly spaced and at a certain height. The mortar also needs to be even, and this can only be done by checking the bricks. After the row is finished, the bricklayer needs to remove excess mortar with a trowel and then finish the mortar joints for a clean, professional appearance.
When a brick wall is being built, there are several different patterns that can be used. Some of these include soldier courses, which have the bricks set vertically and with the ends facing out, or running bond, which has the bricks set horizontally with the ends facing in. Depending on the purpose of the wall, there will be other variations that can be used to add extra strength or aesthetics.
Once the foundation is laid, the bricklayer can start building the masonry walls. It is important to lay a solid, thick foundation to ensure that the brickwork is stable and strong. This can be achieved by digging a trench that is at least a foot deep and wide, then mixing the correct ratio of sand to cement for the mortar that will be used to construct the wall. This mixture should be a consistency that can be easily manipulated with the hands.
The next step is to set up indicator posts or measuring rods at both ends of the masonry wall to help maintain consistent levels throughout. These should be 65mm (if using standard sized bricks) above the ground at both ends of the wall. A string line should then be set up between these, and this will act as a guide for the bricklayer. The bricklayer should always use the string line and level to check that the brickwork is correctly positioned as they build the walls.
For a cleaner, more professional look, the bricklayer can use a tool called a butcher, which is a small, round tool that allows them to create a curved edge on the joints of the bricks. This gives a much more finished appearance to the brickwork and helps prevent water from collecting in the joints and potentially damaging the structure of the wall.